
Bill Pay is a secure and convenient service that enables you to receive, view, and pay your bills from one centralized place. You can use Bill Pay to send money to anyone in the United States that you would normally pay by check, automatic debit, or cash. Bill Pay sends payments electronically when possible, but if the biller can’t accept electronic payments, the service will print and mail a check for you. Plus, Bill Pay payments are guaranteed — if you schedule your payment according to the terms and conditions of the service and it arrives late, any late charges up to $50 will be covered by SESLOC.
Bill Pay is available in Classic View through December 31, 2024. On January 1, 2025, the link to toggle between the modern and Classic Views will be removed. Click here to learn about using the modern view.

Switch to Classic View
In the modern view, select the Switch to Classic View link in the upper right hand corner.
To switch back to modern view, select the link that says Switch to New Bill Pay.
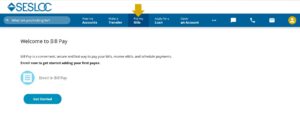
Enroll in Bill Pay
You must enroll in Bill Pay in the current version before you will be able to toggle to Classic View.
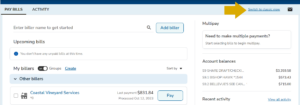
To get started, select Pay My Bills from the Menu bar.
The first time you attempt to access the bill pay section of online banking, you will be prompted to confirm your enrollment by selecting Get Started and agreeing to the terms and conditions. And that’s it! You’re ready to start using Bill Pay.
Navigating Bill Pay Classic View
Bill Pay Classic View has the following tabs:
- Payment Center: The main hub of Bill Pay, where you can manage billers and payments, enroll in eBills, and set up reminders
- Activity: View payments & reminders
- Accounts: View linked checking accounts
- Profile: View your Bill Pay profile options
- Help Center: Access FAQs and tips from Bill Pay
Adding Billers in Bill Pay
Your billers can include any merchant, biller, or individual. In the Payment Center, which is the main hub of Bill Pay, click on Add a Company or Person.
Adding a Company
The Company tab includes a list of common service categories like utilities and insurance. Click on the service to expand a list of common service providers. If your billing company is represented, you just have to select it from the list and enter your Account Number to add them to your contacts.
If you are manually entering a company not listed, you will need to provide the Company’s name, address, telephone number, and your account number.
Double check that your account number is correct — inaccurate information can delay or prevent your payment, and late fees, finance charges, or service disconnections may result.
Adding an Individual
You can also add individuals in case you need to pay a friend, family member, or a service provider like a babysitter. To add an individual, click the Person tab and enter their name, address, and phone number.
Editing or Deleting Billers in Bill Pay
You can edit or delete a biller’s details once they are added to the Payment Center. Under the biller’s name, click Details. Update their information and save changes, or delete to remove them.
Enrolling in eBills
Some billers can even send your bills electronically directly to Bill Pay. Your eBills will appear in the Payment Center where you can set up your payment or manage AutoPay.
Here’s how it works: Companies that offer eBills will display an option for your to request the service through Bill Pay. Your request will process and you will start receiving your eBill with a month or so depending on the billing cycle. Please note that some companies will stop sending paper bills once eBilling is active.
You can elect to stop receiving eBills at any time. Choose the contact in the Payment Center, open the eBills section, and select the option to stop. Once you cancel your eBills, any scheduled automatic payments will be cancelled. It may take one or two billing cycles before the company stops sending eBills, and it may take one billing cycle before you start receiving paper bills again.
After you cancel an eBill, you can still pay the bill through Bill Pay but you won’t be able to access the bill online in the Payment Center.
Scheduling Payments in Bill Pay
Scheduling a Payment
- Select the contact you wish to pay.
- If you have multiple checking accounts linked to your Bill Pay, you will be able to select which account to pay from the drop down.
- Enter the amount.
- Enter the delivery date. Enter the delivery date. Bill Pay uses a “Due Date Focus” which means you select the date you wish for the check to arrive to the biller. Please note:
- Standard delivery is free, but there is a fee for next day Rush Delivery. Any fees will be displayed at date selection.
- Payments are made electronically whenever possible, but if the biller cannot accept an electronic payment, a paper check is printed and mailed. Electronic payments are typically delivered within one to three business days, and mailed paper checks typically take between three to five business days.
- Click Send Money to review your payment and make any corrections.
- Submit payment to confirm.
Scheduling AutoPay
AutoPay allows you to set up a recurring schedule so you don’t have to worry about missing payments.
- Click AutoPay under the contact.
- Enter the amount.
- Enter the first delivery date.
- Select the frequency of payments.
- Select duration. You can set automatic payments to continue unless you cancel, or if you’re paying something with a defined term like an auto loan, you can set the schedule to end after a specified number of payments or a specific date. You can even edit the last payment amount if it will be different.
- Elect your email notifications. You can be notified when the payment is pending, when the payment has been sent, or before the last payment is sent if you specified a duration.
- Click to save changes.
- The contact will now display an AutoPay button on the Payment Center. Click it to see details about your AutoPay schedule . You can change or cancel your AutoPay at any time by selecting the contact on the Manage My Bills tab.
Edit or Cancel Scheduled Payments
Need to change or cancel a payment? You can edit a pending payment as long as it hasn’t started processing. Pending payments will be listed in the Pending Payments box that appears on the right side of the Payment Center or in the Activity tab. Click on the payment to select Change or Cancel. If the payment is processing, please call us at (805) 543-1816 or contact Bill Pay support at 1-844-699-1620 to investigate if a stop payment is possible.
Setting Up Bill Pay Reminders
Bill Pay Reminders offer peace of mind by alerting you with an email when a payment is due, when a payment has been sent, and if the bill was not paid by the due date. Your reminders will also appear as a list on the right side of the Payment Center.
- Click Reminders under the contact you wish to set up an alert for.
- Enter the Typical Due Date.
- Enter the Typical Amount Due.
- Select the frequency that you receive the bill.
- Select how far in advance of the due date to send the reminder.
- Elect your email alert options.
- Click Send Reminders
Details about your reminder will appear when you click Reminders under the contact you set it up for. You can change or cancel at any time by selecting Change Reminders or Stop Reminders.
")